Saturday, July 5, 2014

Flea Market Finds

A lot of times, flea markets turn out a bit on the lame side.  I usually end up with a few nick knacks and call it a day.  Well, this time, browsing the 20 isles in the beating hot sun finally paid off.
I thought I would share with you today's finds.

First off,
The main thing I was looking for, a wooden crate.
And when I finally came across one, ready to pay, the man gave me the look of, you silly girl.  Turns out, the produce stands throw them out like napkins!


My husband ended up with a Biltmore Estate pewter cup in brand new condition. 


And a scythe, which is perfect for our No-Till plan for next years garden.  
Plus it just looks cool. :)


And now for the best find yet!  We'll be moving to the country soon and slowly searching for more sustainable tools to help start our new lifestyle.  However, I never imagined to find one that I've been wanting more than anything at a Flea Market!  


Thats right!  A USA made, cast iron Hand Mill!  It even came with 2 extra grind fittings (I have no idea what they are actually called.)  And for only $10, I'm way happy.  


So, word of advise, if there's something you really want, but don't need right away, check out your local flea markets.  It could pay off. 


Thursday, June 12, 2014

Tallow Candles

This next blog post is a preparedness project. 
If you ever take the time to stock up on the necessities in life, you know you can never have enough light.  Whether its flashlights or candles.  So today I'm going to talk about a simple way to make candles with supplies you most likely already have.

The only thing you need for the "wax" is tallow, or rendered animal fat.
Rendering means cooking the fat long enough to melt it.
What I like to do is save my rendered fat every time I fry up some meat to use later.


I'll briefly explain the process of this project as it is really simple.
After you've got your fat stored up in the fridge, find some kind of container for your candles.  I prefer jars, in this case baby food jars, and my husband picked out one of his old bb pellet tins.  Just be sure its cleaned thoroughly.  You will also want to put a tray or plate under them in case you spill any tallow later.


Next, you will need some sticks and wicks.  I actually made my own wicks by soaking hemp string in some of the melted tallow and allowing it to dry for a few minutes.

Tie your wick to the center of the stick and cut off enough to go all the way to the bottom of the container.  If you're using something wide and shallow, like an Altoids tin, you may want at least 3 wicks to make sure the tallow burns evenly.


Then, melt your fat.


Once it becomes liquid you can strain it if you want. Then poor into the jar, making sure to get a little on the wick.  Double check that the wick is in the center when your done.


All you do now is let it become solid again.  As long as your container is air-tight, it doesn't have to be refrigerated and will last a very long time.  Just a quick note though, tallow is a very soft substance.  If you want your candle to be more firm, you can just put it back in the fridge until use.

And there you have it.  An easy, cost efficient prep item.  Have fun!


Thursday, May 29, 2014

Kombucha Time!

We finally took the day to rescue our poor, neglected 8 Kombucha cultures.
Well actually we only rescued one.  The rest went into compost.
Got a little ahead of ourselves last year and ended up, well, forgetting about them. 
Turns out, a year later, they were all healthy and living.  Just huge!!
So we decided to put 7 to rest and start up a new one. 

Its been about a week now and already a new culture is forming!  


The cloudy white stuff you see on the top is the new culture and on the bottom is the original.  


If you have no idea what a Kombucha is, basically its a fermented tea.  
One that is full of probiotics and antioxidants that boost your immune system, naturally detoxifies, helps your liver function, and fills you with energy.  Not only that, but it is also rich in B-Vitamins which help your heart, stress level, memory and much, much more.


If you would like more info or to make your own kombucha, head over Here for your very own scoby. Fingers crossed it will be delicious.  The hard part is being patient.  


Monday, May 26, 2014

Worm Assisted Compost vs. Commercial Topsoil

So, today I would like to take a moment to show a comparison from this year's garden.
Since last year's turned out to be a bust, we were originally planning on just having one tomato plant.  So we poured our 10 gallons of natural, worm assisted compost we'd been saving all year into a single, 3' x 3' box.  

Shortly after, we all decided on a bit more garden and added a bigger 4' x 8' garden bed which now holds 30 onions, 1 green pepper, and 2 more tomato plants.  This one we just filled with your ordinary, run of the mill topsoil, peat moss and a bag or two of commercial compost.  Now let me just add in that we planted the larger one a little earlier and right after wards it got almost completely killed with frost.  

I'm talking only one part of a leaf to speak of.


Only a few weeks in now, and we are shocked at the difference in the beds.  Worm compost beats the pants off of miracle grow. The race is on!  Worm compost is ahead by a mile.


Thursday, May 22, 2014

Growing Celery in Water


We began the experiment of growing celery from our scraps just five days ago and you can already see a big difference.  All you have to do is cut off the bottom and place it in a dish of lukewarm water.  Make sure the water doesn't reach the top of the celery.  Then stick it in the window sill and wait.  Once the leaves come up, plant it.  That's it!

Here is day One:

Day 2 (Switched Containers):

Day 3:

Day 5 (Forgot day 4):


This is just so fun to watch and I love the fact that I don't have to waist our scraps!

Tuesday, May 20, 2014

Thick Fluffy Sourdough Pancakes


Ok, so I just got done making my second batch of these pancakes.
They are the best I have ever had.  Really.


My first batch, I decided to take a chance with whole wheat flour.
I thought, 'Man I'm going to hate these, but oh well.'

I remember being the pickiest 8 year old when it came to food and mom telling me she was making pancakes one day.  I brought up my plate and she plopped down a brown mass of buckwheat.  It scarred me for life. (Just kidding Mom. ;) )


So I decided to give it a shot one more time since I have never liked any of my other pancake recipes anyway.  The problem I've had is that they always seem to soak up all of the syrup and become this sugary sponge that feels like diabetes waiting to happen.
I hate that.

Well, these were so good I have made another batch, mostly whole wheat with some of my excess white flour starter.

Now, if you don't have a sourdough starter or need to learn more about it, I would recommend The Bread Geek.  She knows practically everything about it.


The good thing about sourdough pancakes is that your starter doesn't have to be in its prime.  It actually just reacts with the baking soda to make it extra fluffy.  Although if your starter has got that good sour flavor, it also gives them a slight tang, which personally I find even better.
  
This recipe does take some getting used to.  My first batch didn't go quite as smoothly being as how I'm used to a watery batter, but it is way worth it and much easier to flip without breaking.


I ended up with 8 pancakes (a few got larger the more hungry I became.)  They freeze really well and out of the toaster they still taste freshly made.

For all of this recipe and a few tricks, head over to Shannon's Blog.

Sunday, May 4, 2014

Is that a Squirrel in the Next County?

So this weekend has definitely been an eventful one.
First off, its the weekend before Mother's Day (don't forget!) and I got to be off!
When working in a Florist, this is like, unheard of.  Seriously.
Also, we were recently chosen as a qualifier for a local outdoor giveaway.  Way exciting!  
I got all the way down to fifth place and came home with tons of paracord and a free rafting trip!


After all that excitement and almost passing out in front of a bunch of people with cameras, we decided to finally sight in the BB gun.  Yes, a BB gun because we unfortunately live in the city and can't play with our big boy toys.  It is still worth having it "zeroed," as my husband puts it, because it is more than capable of putting a little squirrel or rabbit meat in the pot.


Any who, being 12 year-old's at heart, my husband rigged up a poor man apparatus to make sighting in that much more serious.  I mean, he had to have this Perfect.  So he took this weird metal crate thing that is made to be a stepping stool but really has no practical use at all with some wood clamps he attached to it and clamped her down.


Now this is the Crossman Model 1077 12 Shot CO 2 Air gun ordered on ebay.  The sight was bought separately.  After laying a mat down on the grass next to the contraption 39 yards away, we then shot bb after bb and went through 3 CO 2 cartridges before finally calling it done.  Yes, it took forever.  And we still never got it in the center.  Even after everything was perfect and held in very still, no dead on shots were to be found.  


I guess you could say there was a possibility of human error, however we refuse to believe that.  No one else has gone to that much effort of sighting it perfectly that I've heard of.  So the results:  This BB gun is highly unlikely to be accurate from that far away.  Especially once the CO 2 starts running low.  If you want to use this to go squirrel hunting, keep in mind you will have to aim high after the first 12 shots or so.  At least we still have a somewhat tactical toy to play with when the urge strikes.


Friday, March 21, 2014

Aluminum Free??

So I've been on a baking craze lately.
I tend to learn something new and obsess over it for a bit before moving to the next.
My latest obsession is natural yeast (a later blog post.)  Zucchini Bread (a huge hit btw) was up next so I went to the store for some ingredients.  One of them was baking powder. 

In a hurry, I picked up the first, generic brand, and plopped it in the buggy. Just then I thought, I am making bread yeast the natural way and sticking who knows what in there with it.  That just defeats the purpose! 
I didn't bother reading the ingredients because, lets face it; generic is not top notch stuff.  I then carefully looked for the words, non gmo and found one.  But then I noticed, beside it, an even smaller container of baking powder with a phrase highlighted on the front.
"ALUMINUM FREE"....

Ummm, what? 
So they can just stick whatever the heck they want to in our food now?  (The answer is a big yes btw.) 
Not only that, but they make you think you're buying quality by labeling it, non gmo.

Later I decided to find out what could provoke them to add aluminum, so I did some research. Just a little.  Well, surprise surprise.  They started putting it in there to save money.  Originally, baking powder was made with baking soda and cream of tarter.  Well, this got expensive to use.  ( A whole few cents extra people.)  So they started using alternative acids instead of cream of tarter.  One of which is sodium aluminum sulfate.  Aluminum.  Apparently it reacts the same way with the baking soda, so yeah, that makes it alright...

Since then I have been carefully reading the ingredients list in everything I buy.  I am not able to get all of the good stuff yet since anything natural or chemical free is of course costly, but this has taught me to at least pay attention.

It has also proved that having your own source of food or shopping at farmers markets will improve your health and quality of life tremendously. 

Monday, March 3, 2014

Sending some lead Down Range

Finally got a chance to try out BOTH of our Cold War Era Makarovs. They are actually 9mm Makarovs 9x18, not the 9mm lugars 9x19, which would make you think they would be hard to find, but surprisingly with the recent ammo scare, no one seems to be buying them up besides the few of us who are lucky enough to own one of these fine guns. My wife has the smaller version and loves it, however keep in mind, it has more recoil since its a smaller pocket type gun. Check out the vid to see how we did.

Tuesday, January 14, 2014

Stew for Storage

There are so many nutritional foods and ways to store them that it gets to be confusing sometimes on what to save first.

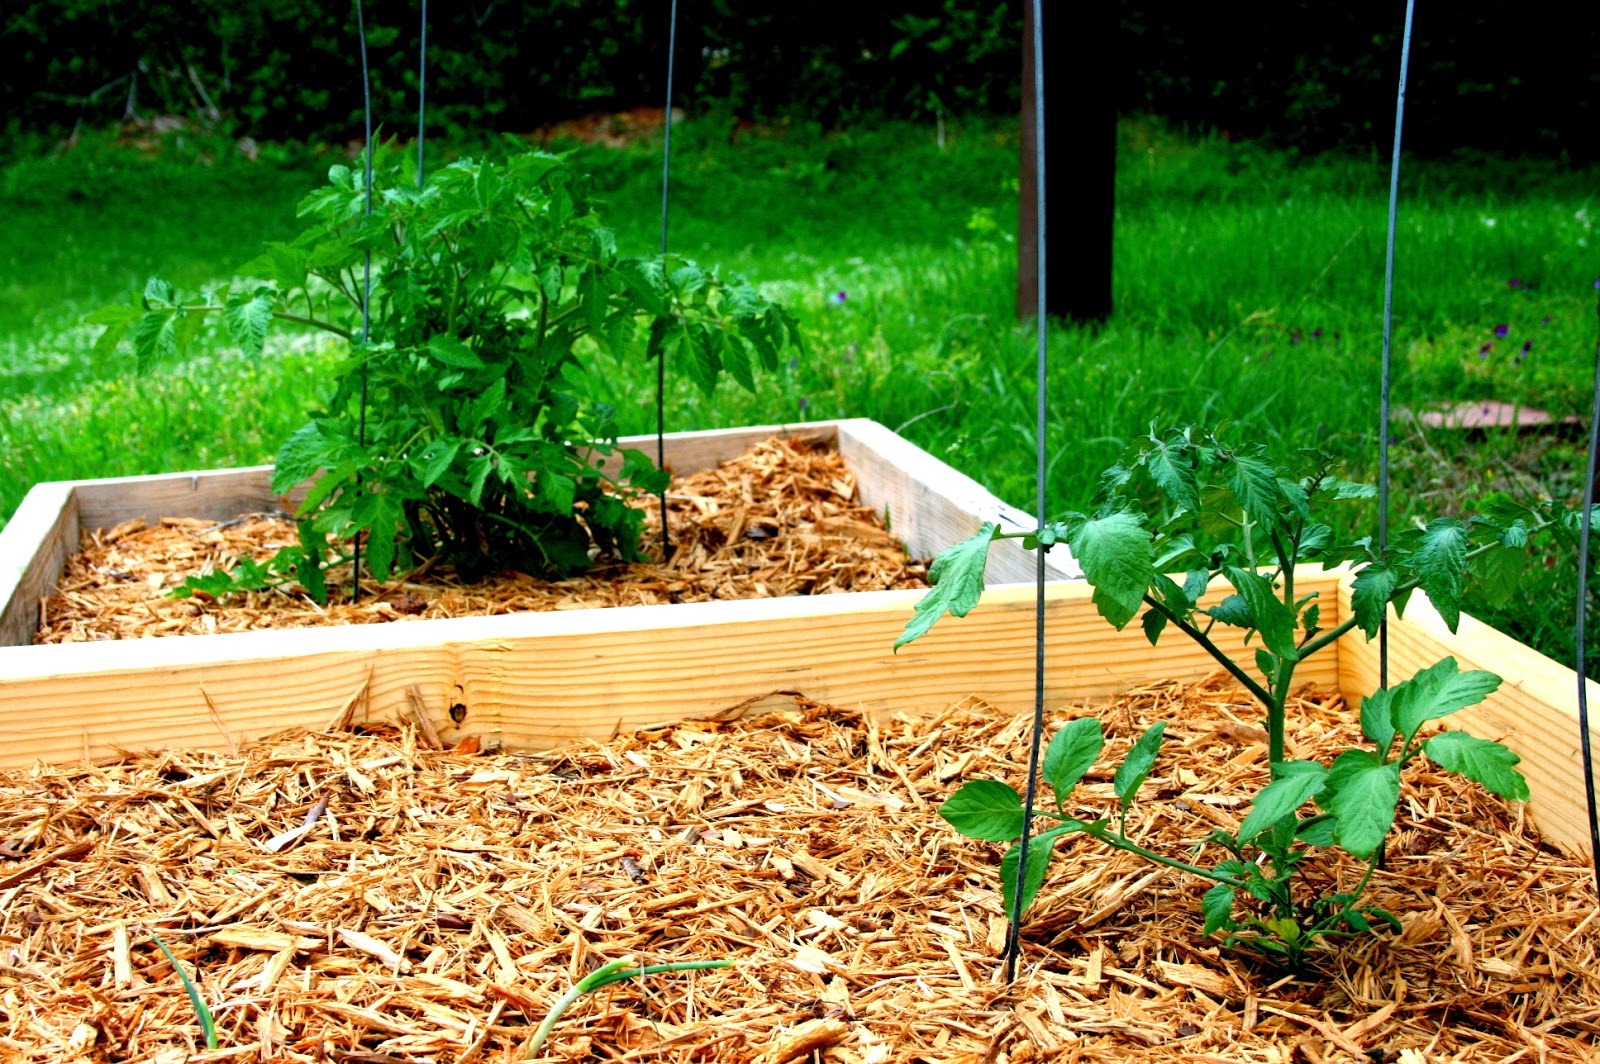
Do you go for vitamin c? Protein? Calories?  The list goes on and on.  And if you aren't lucky enough to have a garden some things are just not very affordable.  (Please try to have at least a small garden next season.  It is way worth it.)


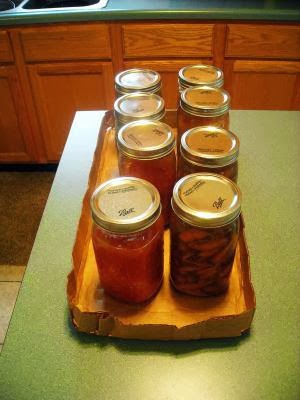
We just recently started pressure canning and it is Way Awesome!  (I used to go with the oven method and that was anything but successful.)  So amidst my husband canning anything he can get his hands on, we recently realized a great couple of foods that cover the basics and are easy to come by.

Carrots & Potatoes!

Yeah, not what you would have said huh?
Well, let me explain our thinking.

First off, carrots and potatoes are both very easy to grow and tend to yield a lot.  They also save space and are easy to harvest.  Just about any gardener grows these plants for those very reasons.  They are also very easy to come by.

Potatoes. They are such a good staple.  Like rice, you can add it to anything to make a bigger meal and can be cooked in many ways.  And in case you didn't know, they are also nutritious!  There is as much fiber in a potato as there is in pasta or bread.  The skin of a potato even has Vitamin C.

Carrots.  There are so many nutrients in carrots, mainly B-Carotene which metabolizes into Vitamin A.  They are rich in antioxidants and minerals.  They naturally help with poor vision, the digestive system, constipation, and many more things.

Still thinking, why carrots and potatoes?
Well, if you for some reason ran out of food or couldn't afford to buy anything, most likely you will be out hunting (as long as you aren't a vegetarian or don't live in the middle of the city.)  So protein is already covered for the most part.

And instead of opting for straight meat, you're going to want to make something with it.  Hopefully you will be out finding wild herbs or whatever, but that's not enough.

So what can you do with it?  How can you make that meat stretch?  Make a Stew of course!
Just about any meat can go in a stew and will go perfect with carrots and potatoes.  The meat and veggies will both flavor each other and you already have most of what you need.

Having them on the side is just fine and dandy, but when you're down to the back up food, you want to have something a little different every now and then.  And by storing these two basics, you'll almost have everything needed for a stew.

Other veggies are also very important.  These are just the two we could easily access that made the most sense.  Have any more ideas of how to use carrots and potatoes?  Or possibly an even better food to store?

If so, please share.  We'd love to hear it. :)